
The DOM stands for the Document Object Model (DOM), which allows us to interact with the document and change its structure, style, and content. We can use the DOM to change the content and style of an HTML element by changing its properties.
We can manipulate or change the DOM elements by using the following methods:
You can change the content inside an HTML element using JavaScript. The two most common properties for this are innerHTML and textContent:
<body>
  <div id="example1">This is the original content using innerHTML.</div>
  <div id="example2">This is the original text content using textContent.</div>
  <button onclick="changeContent()">Change Content</button>
  <script>
  // Function to change content
  function changeContent() {
    document.getElementById("example1").innerHTML =
      "This is changed using innerHTML!";
    document.getElementById("example2").textContent =
      "This is changed using textContent!";
    }
  </script>
</body>

You can add, remove, or toggle classes on an element using JavaScript. This is helpful for styling or applying animations.
<html>
<head>
  <style>
    .highlight {
      color: red;
      font-weight: bold;
    }
    .bold {
      font-weight: bold;
    }
  </style>
</head>
<body>
  <div id="example" class="bold">This is a text element with the "bold" class.</div>

  <button onclick="addClass()">Add 'highlight' Class</button>
  <button onclick="removeClass()">Remove 'bold' Class</button>
  <button onclick="toggleClass()">Toggle 'highlight' Class</button>
  <script>
    function addClass() {
      document.getElementById("example").classList.add("highlight");
    }
    function removeClass() {
      document.getElementById("example").classList.remove("bold");
    }
    function toggleClass() {
      document.getElementById("example").classList.toggle("highlight");
    }
  </script>
</body>
</html>
You can directly manipulate the CSS styles of an element using the style property. This allows you to dynamically change how elements appear on the page.
// Changing multiple CSS properties
document.getElementById("demo").style.color = "red";
document.getElementById("demo").style.fontSize = "20px";
// Adding more than one style
document.getElementById("demo").style.cssText = "color: blue; font-size: 18px;";
Sometimes, you need to create new elements, add them to the DOM, or remove existing ones. You can do this easily with the following methods;
// Create a new element
let newDiv = document.createElement("div");
newDiv.textContent = "This is a new div";
// Add the new element to the DOM
document.body.appendChild(newDiv);
// Remove an element from the DOM
document.body.removeChild(newDiv);
You can insert new elements at specific positions relative to existing elements using methods like insertBefore().
// Create a new element
let newDiv = document.createElement("div");
newDiv.textContent = "This is a new div";

// Find an existing element to insert before
let referenceNode = document.getElementById("referenceElement");

// Insert the new element before the reference element
document.body.insertBefore(newDiv, referenceNode);
You can easily get, set, or remove the attributes of an HTML element using the following methods:
// Get the value of an attribute
let src = document.getElementById("image").getAttribute("src");

// Set a new value for an attribute
document.getElementById("image").setAttribute("src", "new-image.jpg");

// Remove an attribute
document.getElementById("image").removeAttribute("src");
HTML5 introduced data attributes, which are custom attributes that you can use to store extra information about an element. These are particularly useful for adding data to an element without affecting its visual structure.
// Setting a data attribute
document.getElementById("demo").dataset.userId = "12345";
// Getting a data attribute
let userId = document.getElementById("demo").dataset.userId;
console.log(userId); // Outputs: 12345
Adding a class to a DOM (Document Object Model) element in JavaScript is a fundamental task that enables developers to dynamically manipulate the appearance and behavior of web pages. Classes in HTML provide a powerful way to apply CSS styles or JavaScript functionality to multiple elements at once.
By using JavaScript, you can easily add, remove, or toggle classes on elements, making your web applications more interactive and responsive to user actions.
These are the following approaches:
In this approach, we are using classList property to add the class into the DOM element. It returns the class name as a DOMTokenList object. It has a method called “add” which is used to add class name to elements. We will access the div using the getElementById and we will use the add property of classList to add a class.
element.classList.add("className")
<!DOCTYPE html>
<html>
<head>
  <style>
    .geek {
      background-color: green;
      font-size: 50px;
    }
  </style>
</head>
<body>
  <button onclick="myClass()">Try it</button>
  <div id="gfg">Geeks for Geeks</div>
  <script>
    function myClass() {
      let elem = document.getElementById("gfg");

      // Adding class to div element
      elem.classList.add("geek");
    }
  </script>
</body>
</html>

HTMLElementObject.className
<!DOCTYPE html>
<html>
<head>
  <style>
    .geekClass {
      background-color: green;
      text-align: center;
      font-size: 50px;
    }
  </style>
</head>
<body>
  <div id="gfg">
      Geeks For Geeks
  </div>
  <button onclick="myClassName()">Add Class</button>
  <script>
    function myClassName() {
      let element = document.getElementById("gfg");
      // Adding the class geekClass to element
      // with id gfg space is given in className
      // (" geekClass") as if there is already
      // a class attached to an element than our
      // new class won't overwrite and will append
      // one more class to the element
      element.className += " geekClass";
    }
  </script>
</body>
</html>

Selecting DOM (Document Object Model) elements is a fundamental aspect of web development with JavaScript. It allows developers to interact with and manipulate elements on a webpage dynamically. Proper selection of elements is crucial for tasks such as updating content, adding event listeners, or modifying styles.
Below are the approaches to select DOM elements in JavaScript:
This method selects a single element by its unique ID attribute.
document.getElementById('id')
<!DOCTYPE html>
<html lang="en">
<head>
  <meta charset="UTF-8">
  <meta name="viewport" content="width=device-width,
    initial-scale=1.0">
  <title>getElementById Example</title>
</head>
<body>
  <h1 id="gfg">GeeksForGeeks</h1>
  <script>
  // styling the h1 tag
  const element = document.getElementById('gfg');
    element.style.color = "green";
    element.style.textAlign = "center";
    element.style.margin = "30px";
    element.style.fontSize = "30px";
  </script>
</body>
</html>

This method selects elements based on their class attribute. It returns a collection of elements with the specified class name.
document.getElementsByClassName('class')
<!DOCTYPE html>
<html lang="en">
<head>
  <meta charset="UTF-8">
  <meta name="viewport"
    content="width=device-width, initial-scale=1.0">
  <title>getElementsByClassName Example</title>
</head>
<body>
  <h1 class="selector">GeeksForGeeks</h1>
  <h2 class="selector">DOM selector in JavaScript</h2>
  <script>
    const elements =
      documSizeent.getElementsByClassName('selector');
      elements[0].style.color = "green";
      elements[1].style.color = "red";
      elements[0].style.textAlign = "center";
      elements[1].style.textAlign = "center";
      elements[0].style.marginTop = "60px";
  </script>
</body>
</html>

This method selects elements based on their tag name. It returns a collection of elements with the specified tag name.
document.getElementsByTagName('tag')
<!DOCTYPE html>
<html lang="en">
<head>
  <meta charset="UTF-8">
  <meta name="viewport"
    content="width=device-width, initial-scale=1.0">
  <title>getElementsByTagName Example</title>
</head>
<body>
  <p>Thanks for visiting GFG</p>
  <p>This is showing how to select DOM element using tag name</p>
  <script>
    const paragraphs = document.getElementsByTagName('p');
      paragraphs[0].style.color = "green";
      paragraphs[1].style.color = "blue";
      paragraphs[0].style.fontSize = "25px";
      paragraphs[0].style.textAlign = "center";
      paragraphs[1].style.textAlign = "center";
      paragraphs[0].style.marginTop = "60px";
  </script>
</body>
</html>

This method selects the first element that matches a specified CSS selector. It returns only one element.
document.querySelector('selector')
<!DOCTYPE html>
<html lang="en">
<head>
  <meta charset="UTF-8">
  <meta name="viewport"
    content="width=device-width,
      initial-scale=1.0">
  <title>querySelector Example</title>
</head>
<body>
  <div class="gfg">GeeksForGeeks</div>

  <script>
    const element =
      document.querySelector('.gfg');
      element.style.color = "green";
      element.style.textAlign = "center";
      element.style.margin = "30px";
      element.style.fontSize = "30px";
  </script>
</body>

</html>

Similar to querySelector, but it returns a NodeList containing all elements that match the specified CSS selector.
document.querySelectorAll('selector')
<!DOCTYPE html>
<html lang="en">
<head>
  <meta charset="UTF-8">
  <meta name="viewport"
    content="width=device-width, initial-scale=1.0">
  <title>querySelectorAll Example</title>
</head>
<body>
  <h1 class="selector">GeeksForGeeks</h1>
  <p class="selector">
    This is showing how to select DOM element
    using tag name
  </p>
  <script>
    const elements = document.querySelectorAll('.selector');
      elements[0].style.color = "green";
      elements[1].style.color = "red";
      elements[0].style.textAlign = "center";
      elements[1].style.textAlign = "center";
      elements[0].style.marginTop = "60px";
  </script>
</body>
</html>

Given a HTML document and the task is to get the all ID of the DOM elements in an array. There are two methods to solve this problem which are discusses below:
First select all elements using $(‘*’) selector, which selects every element of the document. Use .each() method to traverse all elements and check if it has an ID. If it has an ID then push it into the array.
<!DOCTYPE html>
<html lang="en">
<head>
  <title>
    How to get all ID of the DOM
    elements with JavaScript ?
  </title>
  <script src=
    "https://ajax.googleapis.com/ajax/libs/jquery/3.4.1/jquery.min.js">
  </script>
</head>

<body>
  <h1 style="color: green">
    GeeksforGeeks
  </h1>
  <p>
    Click on the button to get
    all IDs in an array.
  </p>
  <button onclick="muFunc()">
    Click Here
  </button>

  <p id="GFG"></p>
   <script>
     let res = document.getElementById("GFG");
     function muFunc() {
       let ID = [];
       $("*").each(function () {
         if (this.id) {
           ID.push(this.id);
         }
       });
       res.innerHTML = ID;
     }
   </script>
</body>
</html>

<!DOCTYPE html>
<html lang="en">
<head>
  <title>
    How to get all ID of the DOM
    elements with JavaScript ?
  </title>
  <script src=
    "https://ajax.googleapis.com/ajax/libs/jquery/3.4.1/jquery.min.js">
  </script>
</head>
<body>
  <h1 style="color: green">
    GeeksforGeeks
  </h1>
  <p>
    Click on the button to get
    all IDs in an array.
  </p>
   <button id="Geeks" onclick="muFunc()">
    Click Here
  </button>
  <p id="GFG"></p>
  <script>
    let res = document.getElementById("GFG");
    function muFunc() {
      let ID = [];
    ID = $("*").map(function() {
      if (this.id) {
        return this.id;
      }
    }).get();
    res.innerHTML = ID;
  }
  </script>
</body>
</html>

Here are the various methods to get the data attributes of an element using JavaScript.
The dataset property in JavaScript allows you to access all data attributes of an HTML element as a DOMStringMap object. It simplifies retrieving, modifying, or interacting with custom data stored in attributes like data-id or data-name.
const e =  document.getElementByID('demo') // Accessing the element
const dataId  = e.dataset.dataID //Access the data-id attribute
<!DOCTYPE html>
<html>

<body>
    <div
        id="element"
        data-typeId="123"
        data-name="name"
        data-points="10"
        data-important="true">
        This is the Target Element.
    </div>

    <br />
    <button onclick="myFunction()">
          Get Attributes
      </button>

      <p id="result"></p>

    <script>
        let result = document.getElementById("result");
        let e = document.getElementById("element");

        function myFunction() {
            let jsonData = JSON.stringify({
                id: parseInt(e.dataset.typeid),
                points: parseInt(e.dataset.points),
                important: e.dataset.important,
                dataName: e.dataset.name
            });
            result.innerHTML = jsonData;
        }
    </script>
</body>

</html>

The getAttribute() method in JavaScript retrieves the value of a specified attribute from an HTML element. To get data attributes, use element.getAttribute(‘data-attribute’). This method allows precise selection and manipulation of individual data attributes without accessing all at once.
<!DOCTYPE html>
<html>

<body>
    <div
        id="target"
        data-typeId="123"
        data-name="name"
        data-points="10"
        data-important="true"
    >
        This is the Target Element.
    </div>

    <br />
    <button onclick="myFunction()">Get Attributes</button>
    <p id="result"></p>

    <script>
        let result = document.getElementById("result");
        let e = document.getElementById("target");

        function myFunction() {
            let jsonData = JSON.stringify({
                id: parseInt(e.getAttribute('data-typeId')),
                points: parseInt(e.getAttribute('data-points')),
                important: e.getAttribute('data-important'),
                dataName: e.getAttribute('data-name')
            });
            result.innerHTML = jsonData;
        }
    </script>
</body>

</html>

When working with the DOM in JavaScript, selecting elements by their class names is a common task. JavaScript provides several methods to achieve this, whether we need to select one or multiple elements. In this article, we will cover different approaches to get elements by class name in JavaScript.
Below are the following approaches to get elements by class name in Javascript:
In this approach we are using the document.getElementsByClassName() method. This method selects all elements with a specific class name and returns a live HTMLCollection. Think of it as a way to collect all elements with same label. In this, list gets updated automatically if elements are added or removed.
var elements = document.getElementsByClassName("className");
<!DOCTYPE html>
<html lang="en">

<head>
  <meta charset="UTF-8">
  <meta name="viewport"
    content="width=device-width,
    initial-scale=1.0">
  <title>Get Elements by Class Name</title>
  <style>
    .output {
      margin-top: 20px;
      padding: 10px;
      border: 1px solid #ccc;
      background-color: #f9f9f9;
    }
  </style>
</head>

<body>
  <div class="box">Box 1</div>
  <div class="box">Box 2</div>
  <div class="box">Box 3</div>

  <div class="output" id="output1"></div>

  <script>
    var boxes =
      document.getElementsByClassName("box");
    var output =
      document.getElementById("output1");
      output.innerHTML =
      "Number of boxes: " + boxes.length;
  </script>
</body>

</html>

In this approach we are using the document.querySelector() method. This method returns the first element that matches the specified selector (class name). It is useful when you only need to select a single element by class name.
var element = document.querySelector(".className");
<!DOCTYPE html>
<html lang="en">

<head>
  <meta charset="UTF-8">
  <meta name="viewport"
    content="width=device-width,'' initial-scale=1.0">
  <title>Query Selector Example</title>
  <style>
    .box {
      padding: 10px;
      margin: 5px;
      border: 1px solid #ccc;
    }
  </style>
</head>

<body>
  <div class="box">Box 1</div>
  <div class="box">Box 2</div>
  <div class="box">Box 3</div>

  <script>
    var firstBox =
      document.querySelector(".box");
      firstBox.style.backgroundColor =
      "lightblue"; // Change the background color to light blue
      firstBox.style.color = "white"; // Change the text color to white
  </script>
</body>

</html>

In this approach we are using the document.querySelectorAll() method. This method finds all elements that match a specific CSS selector, like class name. It gives you a static list, which means it wont automatically update if page changes.
var elements = document.querySelectorAll(".className");
<!DOCTYPE html>
<html lang="en">
<head>
  <meta charset="UTF-8">
  <meta name="viewport"
    content="width=device-width,
    initial-scale=1.0">
  <title>Query Selector All Example</title>
  <style>
    .output {
      margin-top: 20px;
      padding: 10px;
      border: 1px solid #ccc;
      background-color: #f9f9f9;
    }
  </style>
</head>
<body>
  <div class="box">Box 1</div>
  <div class="box">Box 2</div>
  <div class="box">Box 3</div>
  <div class="output" id="output3"></div>
  <script>
    var allBoxes =
      document.querySelectorAll(".box");
    var output =
      document.getElementById("output3");
    var content = "Contents of all boxes: <br>";
    allBoxes.forEach(function (box) {
      content += box.innerText + "<br>";
    });
    output.innerHTML = content;
  </script>
</body>
</html>

This article will show you how to use JavaScript to get value by class name. To get the value of an element by its class name in JavaScript, you can use the getElementsByClassName() method. This method returns an array-like object of all elements with the specified class name. You can then access the value property of the first element in the array to get the value.
<!DOCTYPE html>
<html lang="en">
<head>
  <meta charset="UTF-8">
  <meta name="viewport" content=
    "width=device-width, initial-scale=1.0">
  <title>Get Value by Class Name</title>
</head>
<body style="text-align: center;">
  <h1 class="heading">
    GeeksforGeeks
  </h1>
  <p class="para">
    A computer science portal for geeks
  </p>
  <button onclick="myGeeks()">
    Get Value
  </button>
  <p id="result"></p>
  <script>
    function myGeeks() {
      // Get elements with the class name 'heading'
      let headingElements =
        document.getElementsByClassName('heading');
        // Check if any elements with the
        // specified class name exist
      if (headingElements.length > 0) {
        // Access the value of the first
        // element in the collection
        let headingVal = headingElements[0].innerHTML;
        // Update the content of the 'result' element
         document.getElementById('result')
           .innerHTML = headingVal;
      } else {
        console.log(
          'Element with class name "heading" not found.');
      }
    }
  </script>
</body>

</html>

<!DOCTYPE html>
<html lang="en">

<head>
    <meta charset="UTF-8">
    <meta name="viewport" content=
        "width=device-width, initial-scale=1.0">

    <title>Get Value by Class Name</title>
</head>
<body style="text-align: center;">
  <h1 class="heading text">
    GeeksforGeeks
  </h1>
  <p class="para text">
    A computer science portal for geeks
  </p>
  <button onclick="myGeeks()">
    Get Value
  </button>
  <p id="result"></p>
  <script>
    function myGeeks() {
      // Get elements with the class name 'heading'
      let headingElements =
        document.getElementsByClassName('text');
      // Check if any elements with the
      // specified class name exist
      if (headingElements.length > 0) {
        // Access the value of the first
        // element in the collection
        let headingVal = headingElements[1].innerHTML;
          // Update the content of the 'result' element
          document.getElementById('result')
          .innerHTML = headingVal;
      } else {
        console.log(
          'Element with class name "text" not found.');
      }
    }
  </script>
</body>
</html>
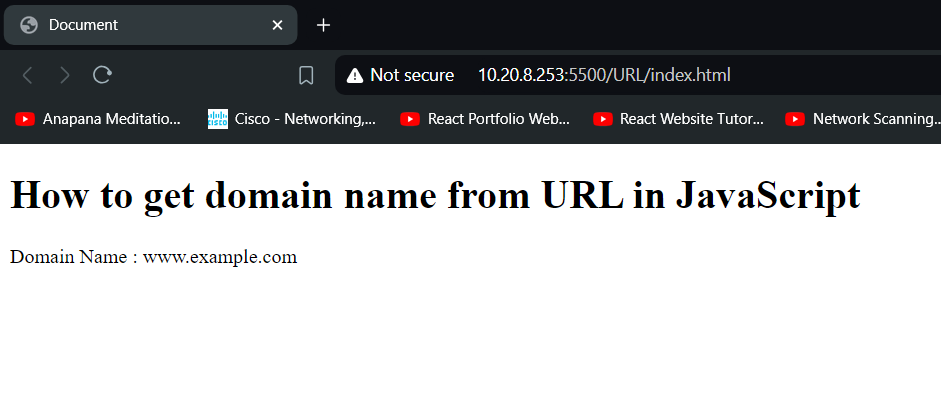
In JavaScript, the URL object allows you to easily parse URLs and access their components. This is useful when you need to extract specific parts of a URL, such as the domain name. The hostname property of the URL object provides the domain name of the URL.
Below are the following approaches to get a domain name from a URL in Javascript:
The new URL(url) constructor parses the URL and creates a URL object. This object has various properties that represent different parts of the URL. The hostname property of the URL object returns the domain name. For instance, for the URL https://www.example.com/path/to/resource?query=param, urlObject.hostname would return www.example.com. If the URL is invalid, the URL constructor will throw an error. In the catch block, you can handle this error, for example by logging it or returning a default value.
<!DOCTYPE html>
<html lang="en">

<head>
    <meta charset="UTF-8">
    <meta name="viewport" content="width=device-width, initial-scale=1.0">
    <title>Document</title>
</head>
<body>
    <h1>How to get domain name from URL in JavaScript</h1>
    <p>Domain Name : <span id="span"></span></p>
    <script src="Index.js"> </script>
</body>
</html>
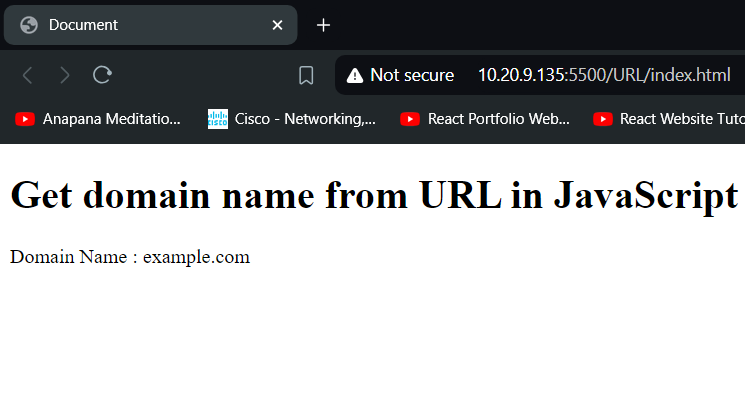
If you want more control or need to support environments where the URL object is not available, you can use regular expressions to extract the domain from the URL string.
<!DOCTYPE html>
<html lang="en">
<head>
    <meta charset="UTF-8">
    <meta name="viewport" content="width=device-width, initial-scale=1.0">
    <title>Document</title>
</head>
<body>
    <h1>How to get domain name from URL in JavaScript</h1>
    <p>Domain Name : <span id="span"></span></p>
    <script src="Index.js"> </script>
</body>
</html>
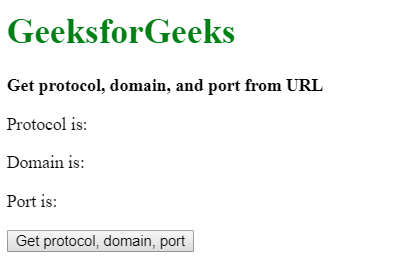
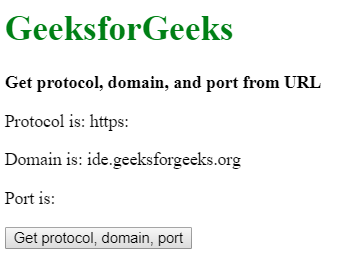
The protocol, domain, and port of the current page can be found by two methods:
protocol = location.protocol;
domain = location.hostname;
port = location.port;
<!DOCTYPE html>
<html>

<head>
  <title>
    Get protocol, domain, and port from URL
  </title>
</head>

<body>
  <h1 style="color: green">
    GeeksforGeeks
  </h1>

  <b>
    Get protocol, domain, and port from URL
  </b>

  <p>
    Protocol is:
    <span class="protocol"></span>
  </p>

  <p>
    Domain is:
    <span class="domain"></span>
  </p>

  <p>
    Port is:
    <span class="port"></span>
  </p>

  <button onclick="getDetails()">
    Get protocol, domain, port
  </button>

  <script type="text/javascript">
    function getDetails() {
      protocol = location.protocol;
      domain = location.hostname;
      port = location.port;

      document.querySelector('.protocol').textContent
        = protocol;
      document.querySelector('.domain').textContent
        = domain;
      document.querySelector('.port').textContent
        = port;
    }
  </script>
</body>

</html>
Note: This API is not supported in Internet Explorer 11.
current_url = window.location.href;
url_object = new URL(current_url);

protocol = url_object.protocol;
domain = url_object.hostname;
port = url_object.port;
<!DOCTYPE html>
<html>

<head>
  <title>
    Get protocol, domain, and port from URL
  </title>
</head>

<body>
  <h1 style="color: green">
    GeeksforGeeks
  </h1>

    <b>
        Get protocol, domain, and port from URL
    </b>

    <p>Protocol is: <span class="protocol"></span></p>
    <p>Domain is: <span class="domain"></span></p>
    <p>Port is: <span class="port"></span></p>

    <button onclick="getDetails()">
        Get protocol, domain, port
    </button>

    <script type="text/javascript">
        function getDetails() {
            current_url = window.location.href;
            url_object = new URL(current_url);

            protocol = url_object.protocol;
            domain = url_object.hostname;
            port = url_object.port;

            document.querySelector('.protocol').textContent
                    = protocol;
            document.querySelector('.domain').textContent
                    = domain;
            document.querySelector('.port').textContent
                    = port;
        }
    </script>
</body>

</html>


Extracting the hostname from a URL using JavaScript means retrieving the domain part from a complete web address. This can be done using JavaScript’s URL object or methods like window.location, which allow easy access to the hostname of a URL.
A URL (Uniform Resource Locator) is the web address used to access resources on the internet, such as webpages, images, or files, through browsers.
Here we are using JavaScript’s window.location object to extract the full URL and hostname. The window.location.href outputs the current page URL, while window.location.hostname retrieves only the domain part (hostname) of that URL.
window.location.propertyname
<!DOCTYPE html>
<html>

<head>
  <title>
    Get domain from URL
  </title>
</head>

<body>
  <h1 style="color: green">
    GeeksforGeeks
  </h1>

  <b>URL is:</b>

  <script>
    document.write(window.location.href);
  </script>

  <br>
  <b>hostname is:</b>

  <script>
    document.write(window.location.hostname);
  </script>
</body>

</html>

Here we extracts the hostname from a user-provided URL by locating the position of “://” using indexOf(). It then loops through characters starting after “://” until it encounters a “/”, constructing and displaying the extracted hostname on the page.
url3.indexOf("://");
<!DOCTYPE html> <html> <head> <title>Extracting URLOutput:

11. How to Get the Current URL using JavaScript?
Here are two different methods to get the current URL in JavaScript.
01. Using Document.URL Property
The DOM URL property in HTML is used to return a string that contains the complete URL of the current document. The string also includes the HTTP protocol such as ( http://).
Syntax
document.URLReturn Value: It returns a string value that represents the full URL of the document.
<script> // Get the current URL using document.URL let currentUrl = document.URL; // Log the URL to the console console.log(currentUrl); </script>Output
http://127.0.0.1:5500/index.html02. Using window.location.href Property
The window.location.href property of the HTML DOM Window object returns a string containing the URL of the current page. This property is part of the Location object, which contains information about the current location of the document.
Syntax
window.location.href<script> // Get the current URL using document.URL let currentUrl = document.URL; // Log the URL to the console console.log(currentUrl); </script>Output:
http://127.0.0.1:5500/index.htmlNote: Use the HTML file to copy paste and run the given code and you can see the output in the console, it will print the URL.
12. How to get URL Parameters using JavaScript?
To get URL parameters using JavaScript means extracting the query string values from a URL. URL parameters, found after the ? in a URL, pass data like search terms or user information. JavaScript can parse these parameters, allowing you to programmatically access or manipulate their values.
For getting the URL parameters, there are 2 ways:
Table of Content
The URLSearchParams interface provides methods to work with URL parameters. After splitting the URL with ?, the parameters part is passed to URLSearchParams(). Using entries(), you retrieve key/value pairs, allowing access to all URL parameters for further use.
let paramString = urlString.split('?')[1];
let queryString = new URLSearchParams(paramString);
for (let pair of queryString.entries()) {
   console.log("Key is: " + pair[0]);
   console.log("Value is: " + pair[1]);
}
<!DOCTYPE html>
<html>
<head>
  <title>
    How To Get URL Parameters using JavaScript?
  </title>
</head>
<body>
  <h1 style="color:green;">
    GeeksforGeeks
  </h1>
  <b>
    How To Get URL Parameters
    With JavaScript?
  </b>
  <p> The url used is:
    https://www.example.com/login.php?a=GeeksforGeeks&b=500&c=Hello Geeks
  </p>
  <p>
    Click on the button to get the url
    parameters in the console.
  </p>
  <button onclick="getParameters()"> Get URL parameters </button>
  <script>
    function getParameters() {
      let urlString =
        "https://www.example.com/login.php?a=GeeksforGeeks&b=500&c=Hello Geeks";
      let paramString = urlString.split('?')[1];
      let queryString = new URLSearchParams(paramString);
      for(let pair of queryString.entries()) {
        console.log("Key is:" + pair[0]);
        console.log("Value is:" + pair[1]);
      }
    }
  </script>
</body>
</html>

Output:


02. Method 2: Separating and accessing each parameter pair

The URL’s query string is split at ? to isolate parameters. Using split(“&”) divides
parameters into an array. Looping through this array, each key-value pair is split by =,
giving keys at the first index and values at the second, enabling parameter extraction.

Syntax:


let paramString = urlString.split('?')[1];
let params_arr = paramString.split('&');
for (let i = 0; i < params_arr.length; i++) {
  let pair = params_arr[i].split('=');
  console.log("Key is:", pair[0]);
  console.log("Value is:", pair[1]);
}


Example: In this example we retrieves URL parameters by splitting the URL string manually. It
extracts each key-value pair, splits them, and logs the results in the console when the button is
clicked.


<!DOCTYPE html>
<html>
<head>
  <title>
    How To Get URL Parameters using JavaScript?
  </title>
</head>
<body>
  <h1 style="color:green;">
    GeeksforGeeks
  </h1> <b>
    How To Get URL Parameters
    With JavaScript?
  </b>
  <p> The url used is:
    https://www.example.com/login.php?a=GeeksforGeeks&b=500&c=Hello Geeks
  </p>
  <p>
    Click on the button to get the url
    parameters in the console.
  </p>
  <button onclick="getParameters()"> Get URL parameters </button>
  <script>
    function getParameters() {
      let urlString =
        "https://www.example.com/login.php?a=GeeksforGeeks&b=500&c=Hello Geeks";
      let paramString = urlString.split('?')[1];
      let params_arr = paramString.split('&');
      for(let i = 0; i < params_arr.length; i++) {
        let pair = params_arr[i].split('=');
        console.log("Key is:" + pair[0]);
        console.log("Value is:" + pair[1]);
      }
    }
  </script>
</body>
</html>


Output:


13. How to parse URL using JavaScript?

Given an URL and the task is to parse that URL and retrieve all the related data using
JavaScript. Example:


URL: https://www.geeksforgeeks.org/courses
When we parse the above URL then we can find
hostname: geeksforgeeks.com
path: /courses


Method 1: In this method, we will use createElement() method to create a
HTML element, anchor tag and then use it for parsing the given URL.


// Store the URL into variable
var url = "https://geeksforgeeks.org/pathname/?search=query";

// Created a parser using createElement() method
var parser = document.createElement("a");
parser.href = url;

// Host of the URL
console.log(parser.host);

// Hostname of the URL
console.log(parser.hostname );

// Pathname of URL
console.log(parser.pathname);

// Search in the URL
console.log(parser.search );


Output:


geeksforgeeks.org
geeksforgeeks.org
/pathname/
?search=query


Method 2: In this method we will use URL() to create a new URL object and
then use it for parsing the provided URL.


// Store the URL into variable
var url =
  "https://geeksforgeeks.org:3000/pathname/?search=query";

// Created a URL object using URL() method
var parser = new URL(url);

// Protocol used in URL
console.log(parser.protocol);

// Host of the URL
console.log(parser.host);

// Port in the URL
console.log(parser.port);

// Hostname of the URL
console.log(parser.hostname);

// Search in the URL
console.log(parser.search);

// Search parameter in the URL
console.log(parser.searchParams);


Output:


https:
geeksforgeeks.org:3000
3000
geeksforgeeks.org
?search=query
search=query


14. Manipulating HTML Elements with JavaScript

JavaScript is a powerful language that can be used to manipulate the HTML elements on a
web page. By using JavaScript, we can access the HTML elements and modify their attributes,
styles, and content. This allows us to create dynamic and interactive web pages.

Methods to Identify the elements to manipulate: There are several methods to identify
the HTML elements that we want to manipulate using JavaScript. The most common methods are:
Accessing the properties of the elements: Once we have identified the HTML element that we want to manipulate, we can access its properties using JavaScript. For example, to access the text content of an element, we can use the innerHTML property. Similarly, we can access the style properties of an element using the style property.
Use Event Listeners to Respond to User Interactions: We can use event listeners to respond to user interactions such as clicking a button or hovering over an element. Event listeners are functions that are executed when a particular event occurs. For example, we can use the onclick event listener to execute a function when a button is clicked.
When building a website or web application, it's common to need to access and manipulate HTML elements using JavaScript. There are several methods available in JavaScript that allow you to do this, including getElementById(), getElementsByClassName(), and getElementsByTagName(). In this article, we'll take a systematic approach to use these methods and show you how to access and manipulate elements in your HTML documents.
The first step in working with HTML elements in JavaScript is to identify the element you want to manipulate. There are several ways to do this, depending on the specific element you're trying to access. Here are some common methods:
let element = document.getElementById("my-id");
let elements = document.getElementsByClassName("myClass");
let elements = document.getElementsByTagName("p");
Once you've identified the element you want to manipulate, you can access its properties and methods. Properties are values that describe the state of an element, such as its innerHTML, value, or src attributes. Methods are functions that allow you to manipulate an element in some way, such as changing its innerHTML, className, or style properties. Here are some examples of how to access an element's properties and methods:
// Accessing an element's methods
element.innerHTML = "New content!"; // changes the content of the element
element.classList.add("newClass"); // adds a new CSS class to the element
element.style.backgroundColor = "red"; // changes the background color of the element
In addition to manipulating elements directly, you can also use JavaScript to respond to user interactions, such as clicks, mouse movements, or keyboard inputs. To do this, you can use event listeners, which are functions that are triggered when a specific event occurs on an element. Here's an example of how to add an event listener to a button element:
<button id="myButton">Click me!</button>
<script>
let button = document.getElementById("myButton");
button.addEventListener("click", function() {
     console.log("Button clicked!");
});
</script>
In this example, we use getElementById() to access a button element with the ID "myButton". We then add an event listener to the button using the addEventListener() method. The event we're listening for is a "click" event, which is triggered when the user clicks the button. When the event is triggered, the function we passed as the second argument is executed, which logs a message to the console.
<!DOCTYPE html>
<html lang="en">
<head>
  <title>document.getElementById()</title>
</head>
<body>
  <h1 id="my-id">Hello World!</h1>
  <script>
    // Get element with id "my-id"
    var elements = document.getElementById("my-id");
    // Change the content of the element
    elements.innerHTML = "New content!";
  </script>
</body>
</html>

<!DOCTYPE html>
<html lang="en">
<head>
  <title>document.getElementsByClassName()</title>
</head>
<body>
  <p class="myClass">This is a paragraph.</p>
  <p class="myClass">This is another paragraph.</p>
  <script>
    // Get all elements with class "myClass"
    var elements = document.getElementsByClassName("myClass");
    // Change the content of the first element
    elements[0].innerHTML = "New content!";
  </script>
</body>
</html>

<!DOCTYPE html>
<html lang="en">
<head>
  <title>DOM Manipulation</title>
</head>
<body>
  <h1 id="my-heading">Hello, World!</h1>
  <button id="my-button">Click me!</button>
  <script>
    const heading = document.getElementById("my-heading");
    const button = document.getElementById("my-button");
    button.addEventListener("click", function () {
      heading.innerHTML = "Button clicked";
      heading.style.color = "red";
    });
  </script>
</body>
</html>
Explanation: In this example, we first access the button element using the getElementById() method. We then add an event listener to the button using the addEventListener() method. The event we are listening for is the "click" event, and the function we want to execute when the event occurs is defined inline.

Conclusion: In conclusion, manipulating HTML elements with JavaScript is a powerful technique that can be used to create dynamic and interactive web pages. By using the methods discussed above, we can identify and access the HTML elements on a web page and modify their properties to create the desired behavior.
The innerHTML property in JavaScript allows you to get or set the HTML content of an element as a string.
let element = document.getElementById("myElementId");
let htmlContent = element.innerHTML;
let element = document.getElementById("myElementId");
element.innerHTML = "New HTML content";
Use JavaScript to select the HTML element you want to manipulate. You can do this using various methods like document.getElementById(), document.querySelector(), or document.querySelectorAll().
<div id="myElement">Initial content</div>
let element = document.getElementById("myElement");
If you want to retrieve the current HTML content of the element, use the innerHTML property.
let htmlContent = element.innerHTML;
console.log(htmlContent);
// Output: Initial content
If you want to replace or update the HTML content of the element, assign a new HTML string to the innerHTML property.
element.innerHTML = "<b>New content</b>";
You can optionally verify that the HTML content has been updated as expected by accessing the element again or using browser developer tools.
console.log(element.innerHTML);
 // Output: New content
<!DOCTYPE html>
<html lang="en">
<head>
  <meta charset="UTF-8">
  <meta name="viewport" content="width=device-width,
                                 initial-scale=1.0">
  <title>innerHTML Example</title>
  <style>
    .container {
      padding: 10px;
    }
  </style>
</head>
<body>
  <div class="container" id="myElement">Initial content</div>
  <button onclick="changeContent()">Change Content</button>
  <script>
    function changeContent() {
      let element = document.getElementById("myElement");
      element.innerHTML = "<b>New content</b>";
    }
  </script>
</body>
</html>

The innerHTML property in JavScript is used to append the dynamic HTML or text content to an element using JavaScript. It is designed to add dynamic HTML, but developers also use it to add text content as well. It can be directly used with the element by selecting it using DOM manipulation.
selectedHTMLElement.innerHTML = "contentToAppend";
<!DOCTYPE html>
<html lang="en">
<head>
  <meta charset="UTF-8">
  <meta name="viewport" content="width=device-width,
                                 initial-scale=1.0">
  <title>
    JavaScript innerHTML
  </title>
  <style>
    #container{
      text-align: center;
    }
  </style>
</head>
<body>
  <div id="container">
    <h1 style="color: green;">
      GeeksforGeeks
    </h1>
    <h2>
      The below content is added dynamically
      using the innerHTML property in JavaScript.
    </h2>
  </div>
  <script>
    const container = document.getElementById('container');
    container.innerHTML +=
      `
      <h3>
        Hey Geek, <br/>
        Welcome to GeeksforGeeks
      </h3>
      <p>
        This content is added using the
        innerHTML property.
      </p>
      `;
  </script>
</body>
</html>

<!DOCTYPE html>
<html lang="en">
<head>
  <meta charset="UTF-8">
  <meta name="viewport" content="width=device-width,
                                 initial-scale=1.0">
  <title>
    JavaScript innerHTML
  </title>
  <style>
    #container {
      text-align: center;
    }
  </style>
</head>
<body>
  <div id="container">
    <h1 style="color: green;">
      GeeksforGeeks
    </h1>
    <h2>
      Click the below button to dynamically add
      the HTML using the innerHTML property.
    </h2>
    <button id="myBtn">Add HTML</button>
  </div>
  <script>
    const myBtn = document.getElementById('myBtn');
    function clickHandler() {
      const container =
        document.getElementById('container');
      container.innerHTML +=
        `
        <h3>
          Hey Geek, <br/>
          Welcome to GeeksforGeeks
        </h3>
        <p>
          This content is added using
          the innerHTML property.
        </p>
        `;
    }
    myBtn.addEventListener('click', clickHandler);
  </script>
</body>
</html>
